If you have a Kitchenaid stand mixer around your cabinet, you know how versatile and indispensable it is. This guy can handle everything, from whipping eggs whites, kneading dough to mixing batter.
With a food grinder attachment on hand, you can do even more, such as grinding meat, vegetables, fruits, bread, or hard cheeses. Kitchenaid does offer meat grinder attachments of its own, making its stand mixers even more functional.
How to use a Kitchenaid meat grinder? To grind meat with a Kitchenaid meat grinder, assemble Kitchenaid meat grinder attachments, use your grinder, and clean the attachments after finishing.
Our detailed Kitchen meat grinder instructions below will guide you to do the work step by step. It’s easy, so keep reading!
Table of Contents
What Is A Kitchenaid Meat Grinder?
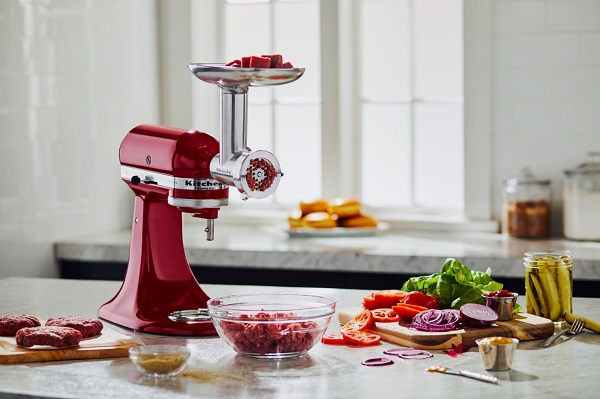
A Kitchenaid meat grinder brings a lot of benefits
As the name hints, an electric meat grinder is meant to grind and mince a broad variety of ingredients, whether for cooking veggie foods like falafel or spiced lamb meatballs.
KitchenAid food grinder attachments can work with other accessories to help you strain vegetable peels and fruits for purees or stuff sausages.
Concerning Kitchenaid meat grinder uses, there are some key benefits to using Kitchenaid meat grinders.
Source
Grinding your own meat allows you to know where your meat comes from and the cuts and varieties you add in your recipes, be it locally-raised or bought from a butcher or a grocery store.
Flavor
With a Kitchenaid, you can easily maintain flavor integrity with fresh ingredients without worrying about commercial preservatives and additives.
It’s also possible to fine-tune the flavor in every recipe by mixing various meat blends, such as easy chicken, pork, and kabobs for homemade dim sum or lamb and beef for tagine cooking or pork and lean beef for the original burger.
Related: How to grind bones without a grinder
Texture
Grinding your own meat provides you with control over the texture of the grind, be it fine or coarse, and allows you to shape items, such as sausages or meatballs, loosely. This way, your meat blends will be tender when cooked, unlike pre-packaged products that might get compressed and make them appear tough.
Versatility
Kitchenaid meat grinders can not only grind meat but also other foods, like potato, squash, sweet potato, or other cooked soft vegetables, to cook pierogi, hash, gnocchi, and more.
Or else, you can team it with the Fruit and Vegetable Strainer attachment to produce fresh baby foods, sausages, fresh jams, and more.
If you have a lot of meat recipes to do and need something helping shorten your cooking time and make the process easier, KitchenAid meat grinder attachments are the way to go.
How To Use Kitchenaid Meat Grinder Attachment?
Now is the time to learn how to use meat grinder attachment Kitchenaid. Though it takes time to read through our instructions, they’ll help you proceed with your grinding so easily.
What You’ll Need
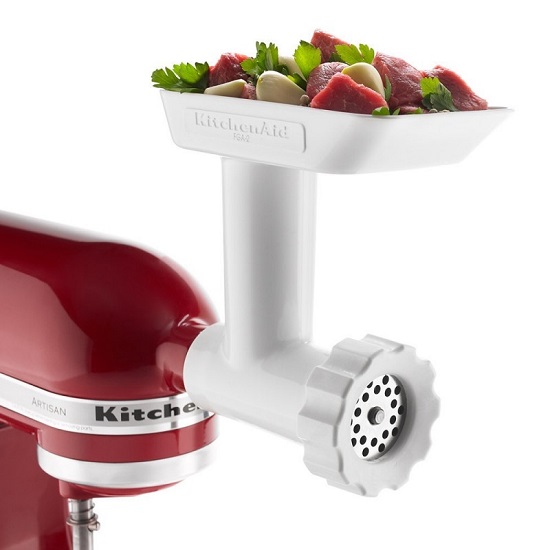
Kitchenaid food grinder attachments are durable and easy to clean
The first item on the list is a meat grinder attachment. There’s a bunch out there either from Kitchenaid or other manufacturers.
We recommend employing the KitchenAid metal food grinder attachment as it offers excellent durability and great ease of maintenance thanks to the steel material.
If it’s your first time unboxing and using your Kitchenaid stand mixer, ensure to wash it before grinding.
The next item, of course, is meat.
For burgers, a mix of sirloin and chuck is the regular ingredient. It’s nice to go for 85% chuck to 15% sirloin, yet if you wish a drier and leaner burger, add some more sirloin.
You can also add more flavor by putting in some brisket to your blend. Whatever cheap roast available works. The best idea is to opt for something with high-fat content, so you can use it for your ground meat concoctions.
Don’t mind experimenting with different ratios. It’s fun to combine 25% ground bacon with 75% ground beef for burgers.
For sausage, the combination of veal or beef and pork is a good idea. Also, try using pork fatback to produce extra juicy sausages.
Prepare Your Kitchenaid and Attachments
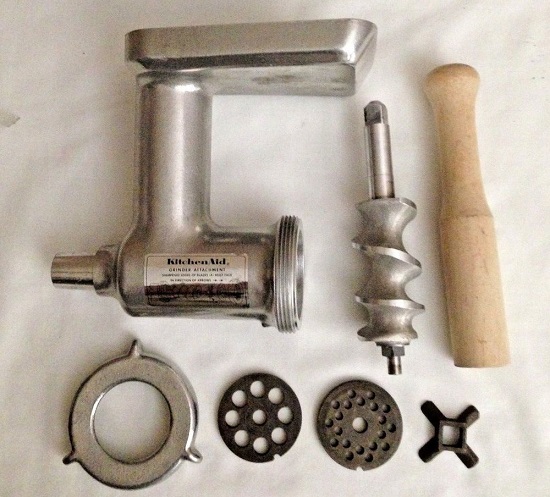
Assemble your meat grinder attachments correctly before starting
Before jumping into grinding, you need to prepare your food grinder and its attachment.
How to assemble Kitchenaid meat grinder? Do you know Kitchenaid meat grinder instructions? With the KitchenAid Metal Food Grinder Attachment, first, you need to insert the grinding screw into the central housing and attach the blade to the screw’s end.
Next, choose and secure one grinding plate with the collar. Then, place the removable tray on the top of the housing feed tube.
The KitchenAid Metal Food Grinder Attachment includes three grinding plates: coarse (8-mm holes), medium (4.5-mm holes), and fine (3-mm holes).
The fine plate is specifically for cooked meats you want to spread; the medium one is a nice option for sausage meat, whereas the coarse plate applies best to grinding raw meat for burgers and chili.
It’s advisable to put your attachment in the fridges a couple of hours before grinding for the sake of food safety. This way, you can save your meat from heating up when coming into direct contact with your stand mixer.
Harmful bacteria tend to thrive on raw meat when the temperature increases, so the cold should be present. It’s better to store your meat grinders in the fridge so that it’s always ready to serve whenever you need them.
Place your meat in the freezer half an hour before grinding meat. Cold meat is tougher and more straightforward to grind than mushy, warm meat.
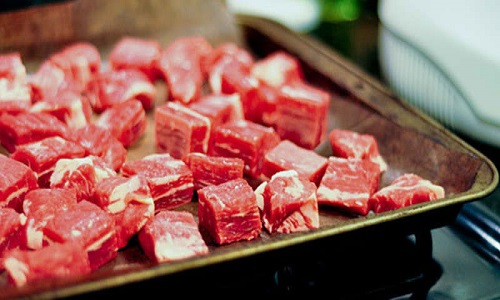
Slice your meat into cubes that have a slightly smaller size than the feed tube. For the majority of devices, this opening usually comes in 1-2 inches.
Sometimes, when you feel too lazy doing so, you can cut it short by cutting the meat into narrow, long strips and just throwing the strips into your Kitchenaid stand mixer. There’s merely a noticeable difference between strips and cubes.
Use Your Grinder
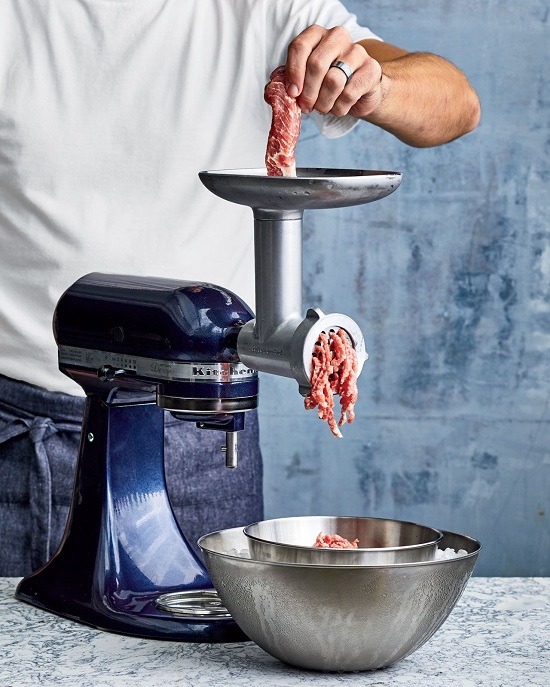
Simply throw your meat into the grinder and let it do the job
We usually use the KitchenAid stand mixer attachments to grind sizable slabs of meat and create personalized concoctions.
For instance, you can make a dish of a half bacon burger and a half beef using pork jowl bacon and black Angus top sirloin. It’s fun.
Using Kitchenaid meat grinder is pretty effortless with breezy steps.
First, select a grinding plate size as per your planned recipe. It’s advisable to opt for the coarse plate in most cases, particularly for chili meat and burgers.
Then, insert the grinding screw into the central housing and cap it with the grinding plate and blade.
Next, attach them to the collar, set your mix to four, and start adding food through the hole in the food tray. As mentioned, you should cut your meat into one or two-inch cubes or smaller, but you don’t expect any trouble adding long one-inch strips.
Hamburger lovers will be amazed at the flavor of the burgers made of home-ground meat. Compared to ground beef bought from a grocery store, your fresh, cost-effective patties are way more flavorful.
Keep throwing meat into the feed tube until you have no meat left to grind, then switch your grinder off.
If you desire more tender, softer meat, feed it into the grinder once again. However, it’s not necessary to do so if you’re using fatty meat.
Clean The Attachment

Clean the attachment right after you’re done with grinding
It will be easier to clean your grinder if you do the task right after finishing the grinding process. Otherwise, it’ll take while to get rid of all the little flakes once tiny pieces of meat fry onto your attachment.
Most components of a Kitchenaid food grinder attachment, except for the grinder body, ring, and food pusher, are not dishwasher safe. Thus, we advise you to wash it manually to improve its longevity, even though your model is deemed dishwasher safe.
Remove the grinder from your stand mixer, take the housing apart, and detach all the pieces. Soak them in a sink of soapy, warm water.
Wash each component using a sponge and a cleaning brush to remove any hard bits of meat. Once you finish cleaning each element, let them dry thoroughly.
As said, we recommend storing your grinder in the freezer to maintain a cold grinding temperature. Yet, you can store it anywhere you like, provided that you ensure it remains dry.
Wrap-Up
Kitchenaid brand offers a variety of meat grinder attachments to help with every grinding task. Since a Kitchenaid stand mixer is applicable to processing any substance, it’s a desirable item in any well-equipped kitchen.
If you’re planning to invest in such a versatile cooking gadget, make sure you’re well aware of how to use and care for it. That way, your meat grinder can help keep your menus highly enticing and last you for longer.


