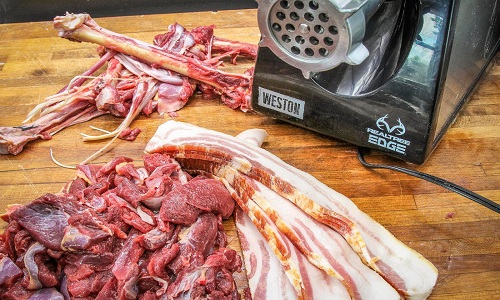
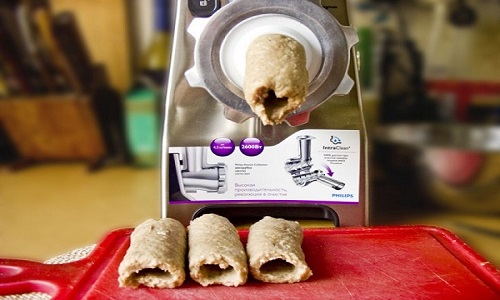
You have just bought a meat grinder but are facing hassles about how to set it up. You don’t know how to ass how to assemble a meat grinder correctly. Assembly is an essential task. It ensures that the meat grinder can operate correctly.
This task can be a bit difficult for beginners. Do not worry; we will guide readers step by step to assemble the meat grinders. Just follow our instructions. You are ready with your ground meat.
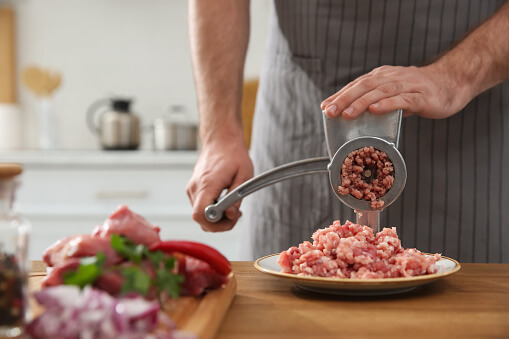
It is quite easy to assemble meat grindersc
Table of Contents
How To Assemble A Meat Grinder?
The meat grinder is one of the practical kitchen tools loved by many housewives. It saves you time and effort in the kitchen. Besides, we can create many delicious dishes with the help of a meat grinder.
Each type of meat grinder has a different assembly based on its grinder parts. In this article, we wants to cover the two most popular types of meat grinders: manual meat grinders and electric meat grinders.
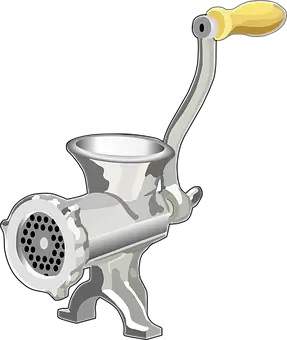
Meat grinder manual
Manual Meat Grinder
A manual meat grinder has a more straightforward structure than an electric meat grinder. However, assembling manual grinders seems to take a little more time. If you don’t know about parts, you won’t be able to set up your manual meat grinder quickly.
Parts To Assemble
- Handle: The grinder handle comes into direct contact with the hand screw. It is where the user holds to create energy to help grind meat. It is where the user holds to create energy to help grind meat.
- Hand screw: The hand screw helps to turn the transfer shaft inter the grinder head assembly.
- Inlet: Inlet has a structure similar to the meat tray.
- Grinder head assembly: The grinder head assembly is the most crucial part of a manual meat grinder. The main body includes grinding parts like a cross knife, grinding plate, transfer shaft, and ring nut.
- Feed screw: The eye screw of the manual one plays the role of pushing the raw meat to the cross knife.
- Cross knife: Cross knife is the grinder blade. It will do the grinding when you turn the grinder handle.
- Grinding plate: This unit is similar to the extrusion plate of an electric one. Usually, there are three options for cutting plates to create the desired form of ground meat.
- Body fixing screw: Body fixing screw helps to secure the grinder body to the work table. Thus, it doesn’t move when you are turning the handle.

Ground meat by a manual meat grinder
Step By Step To Assemble A Manual Meat Grinders
Let’s find out the simple assembly of the meat grinder manual as below steps.
View more: How to use kitchenaid meat grinder
Step 1: Prepare the Grinder Assembly.
Mount the grinder transfer shaft to the head facing outwards. Then, install the cross knife, wing nut, and extruding action to the main body of the manual meat grinder.
Step 2: Set Up Handle & Handle Screw
Let’s insert the handle screw in advance. Then attach the grinder handle. Make sure that both parts are “secured tightly.” Otherwise, you will easily get injured while grinding meat.
Step 3: Fix the Manual Meat Grinder to the Counter
Let’s firmly attach the body fixing screw to the countertop. It will keep the appliance stationary while you grind the meat.
The video below will summarize how you can assemble a manual grinder.
Helpful Tips For Assemble A Manual Meat Grinder
- Arrange all the parts as soon as you take them out of the box. Thanks to it, you don’t miss anything.
- The clamp offered by the manufacturer is the best.
- Clean the manual meat grinder with warm soapy water right after you disassemble.
- Wipe all the parts down before setting up.
- Air-dry the manual meat grinder entirely after cleaning.
- Coat a light coat of cooking oil on the manual meat grinder to avoid rust.
- Newer models often come with a shorter mounting bolt. The bolt can hold both the cutting blades and the right extrusion plate.
- Towards old models, there is only one cutting blade with no extrusion plate.
Electric Meat Grinder
You can’t know how to assemble meat grinder if you don’t even know what to work with. A primary electric meat grinder includes below main parts:
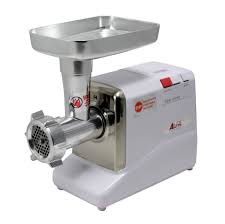
Electric meat grinder
Parts To Assemble
- Meat tray: The meat tray is a hopper. The tray is where the meat needs to be “ground” before it enters the feeding tube.
- Feeding screw: The feed screw helps to turn the meat grinder blade. Thanks to that, it pushes the meat forward of an electric meat grinder.
- Cutting blades: The cutting blade is the essential part. It has a spin and grinds the meat. It then pushes the raw meat through the cutting plate.
- Grinding plate: The cutting plate allows you to create the desired form of ground meat.
- Locking ring: The locking screw secures the screw, plate, and blade altogether.
- Motor container: The motor container accommodates the meat grinder motor.
- Power cord: Some meat grinders come with a non-removable power cord. In contrast, some power cords are detachable.
Step By Step To Assemble Manual Meat Grinders
It’s not difficult to set up a grinder. Usually, it only takes you about 10 minutes to assemble an electric meat grinder from the box.
This process also does not require too much technique. You can rely on the included detailed assembly instructions to speed up the process.
Prepare a large working surface and display all the parts. Let’s assemble them in turn where they belong. Putting them on the table will also make sure you don’t miss any details.
Before any assembly, make sure the machine is not “connected” to a power source. Let’s start assembling your own meat grinder.

Ground beef
Step 1: Set Up the Head Assembly
First, grab the electric meat grinder head and add the feeding screw. Then insert the grinding blade into the last end of the feed screw.
Pay special attention to the flat side of the grinding blade facing outwards. Otherwise, it won’t be able to push the meat out. Then choose one of the metal plates and insert it to the front of the cutting blade.
If the meat grinder head comes with a nut (wing or hex nut), place it and turn clockwise to fix it. Most meat grinders come with a fully assembled head. If so, you can skip this step.
Step 2: Insert the Grinder Head Assembly Into the Motor Body
You can do this step quickly. Fasten the lugs to the proper slots on the motor housing. Make sure they are “connected” together. Now. your meat grinder is ready to start and grind.

Assembling grinders takes only a few minutes
Helpful Tips For Assemble An Electric Meat Grinder
- Place all the parts of the meat grinder as soon as you take it out of the box. There are a few very tiny parts. However, if they forget about them, the grinder can’t work anymore. They can be nuts, lugs, or something like that.
- Prepare a spacious area so that you have quick access to them as you assemble them.
- Even if it’s a new meat grinder, you should still wipe the parts with a damp cloth. The dirt during storage can cause a little trouble for your meat grinder at first use.
Final Words
Most grinders have different configurations depending on the brand that makes them. The assembly is a slight distinction between the kinds of meat grinders.
Besides the basic knowledge above, you can follow the accompanying instructions to complete it quickly.
Let’s start grinding and creating new exciting recipes!


![[Reviews] Best Electric Meat Slicer Under $100, $200, $300, $500](https://meatgrinderguides.com/wp-content/uploads/2019/12/Best-Electric-Meat-Slicer-150x150.jpg)

